
How to run Linux apps on Windows 10-11
Windows Subsystem for Linux 2 (WSL 2), a revolutionary software by Microsoft, bridges the gap between Windows and Linux environments, enabling seamless integration and compatibility for developers. With improved performance, enhanced system call compatibility, and a host of new features, WSL 2 has emerged as a game-changer for developers seeking the best of both worlds. This article delves into the depths of WSL 2, exploring its architecture, benefits, deployment, and key features, while highlighting its potential to transform the software development landscape.
- Understanding the Architecture of WSL 2: At its core, WSL 2 introduces a full Linux kernel, providing a lightweight virtualization layer that allows Linux distributions to run natively on Windows. Unlike its predecessor, WSL 1, which relied on translation layers, WSL 2 offers a real Linux kernel that powers the subsystem. This kernel runs within a lightweight virtual machine (VM), utilizing Microsoft’s Hyper-V technology. This architectural shift enables improved system call compatibility, enhanced file system performance, and greater support for various Linux applications.
- Unraveling the Benefits of WSL 2 : WSL 2 brings a multitude of advantages to developers and system administrators. First and foremost, it offers significantly enhanced performance, ensuring faster boot times, quicker access to files, and lower resource consumption. With its native Linux kernel, WSL 2 provides broader compatibility, enabling the use of Docker containers, Linux-based build tools, and other Linux-specific applications. Moreover, developers can seamlessly switch between Windows and Linux environments, leveraging the powerful Windows tools and ecosystem while still benefiting from Linux’s vast array of command-line utilities.
- Deploying WSL 2: Step-by-Step Guide: Deploying WSL 2 is a straightforward process. To begin, ensure you have Windows 10, version 2004 or higher, installed on your system. Next, enable the Windows Subsystem for Linux feature and install a Linux distribution from the Microsoft Store. Once the distribution is installed, it automatically runs on WSL 1 by default. To upgrade to WSL 2, execute a simple command, and the system will guide you through the installation of the WSL 2 Linux kernel component. After installation, you can set WSL 2 as your default version, and you’re now ready to harness the power of WSL 2 within your Windows environment.
- Key Features and Functionality of WSL 2: 4.1 Seamless Integration: WSL 2 offers seamless integration with Windows, enabling developers to run Linux commands directly from the Windows command prompt or PowerShell, and vice versa. This integration extends to file systems, allowing easy access to Windows files from Linux distributions and vice versa.
4.2 Enhanced System Call Compatibility: With the full Linux kernel, WSL 2 boasts improved system call compatibility, ensuring a higher level of compatibility with Linux applications. This compatibility enables developers to work with a broader range of tools without worrying about compatibility issues.
4.3 Improved File System Performance: WSL 2 leverages a 9P protocol-based file system, resulting in significantly improved file system performance compared to WSL 1. This enhancement translates to faster file access and improved overall system performance.
4.4 Docker Support: WSL 2 brings native support for Docker, allowing developers to run Docker containers directly within the WSL 2 environment without the need for additional virtual machines or complex setup.
4.5 Windows and Linux Interoperability: WSL 2 enables seamless interoperability between Windows and Linux environments. Developers can access Windows files from Linux distributions and vice versa, enabling smooth collaboration and eliminating the need for complex workarounds.
Conclusion: Windows Subsystem for Linux 2 (WSL 2) revolutionizes the software development landscape by seamlessly blending the capabilities of Windows and Linux environments. Its architectural advancements, performance improvements, and enhanced compatibility make WSL 2 an indispensable tool for developers seeking a unified and efficient development experience. With its ease of deployment and powerful feature set, WSL 2 opens new avenues for cross-platform development, enabling developers to leverage the best of both worlds. As Microsoft continues to enhance and refine WSL 2, its potential to reshape the software development landscape is undeniable.
How to Install WSL2
Because WSL2 is now already available on Microsoft Store, you can install WSL2 the same way as installing any other app from the store. Open Microsoft Store then search for wsl. Click the “Get” button to start the installation process.

Installing Linux Distribution on WSL2
Before you can use the WSL2, you need to install a Linux Distribution. To see available Linux Distribution, run “wsl –list — online” command on Windows terminal.

Run “wsl –install <Distro>” to install your prefered Linux Distribution. For example if you want to install Ubuntu, run “wsl –install Ubuntu” on Windows terminal.
Once finished, you will be asked to create user account for Ubuntu. The username does not need to match with your Windows username.
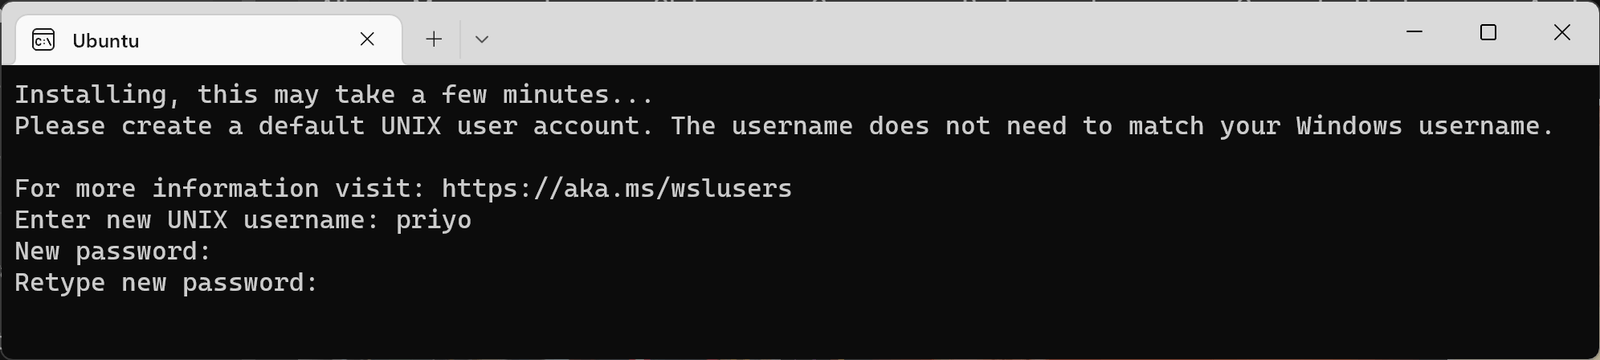
Congratulations, your Ubuntu installation is already finished and ready to use.

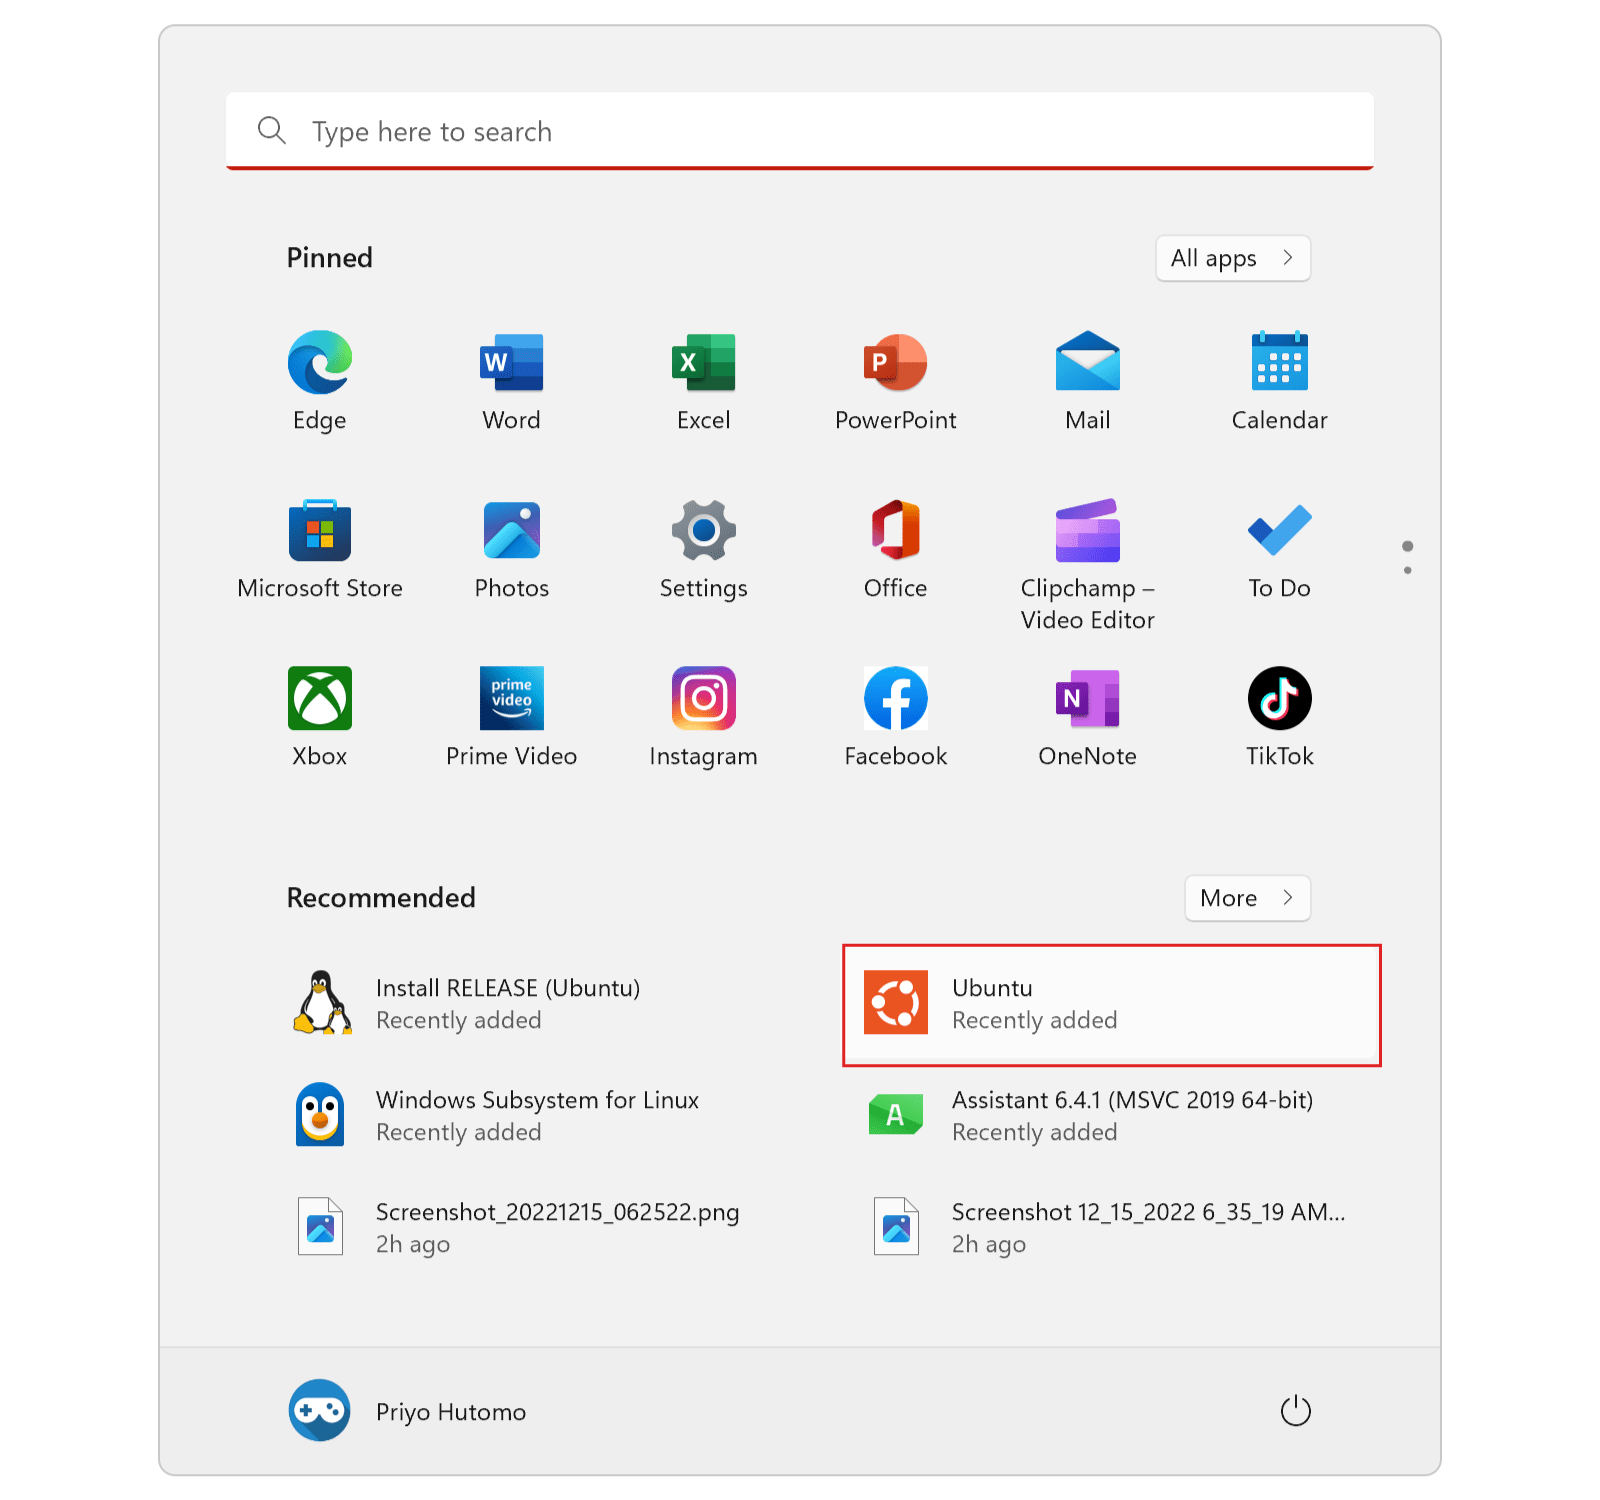
Just like other Windows app, you can run Ubuntu from Windows Start Menu.
How to Enable Systemd Support
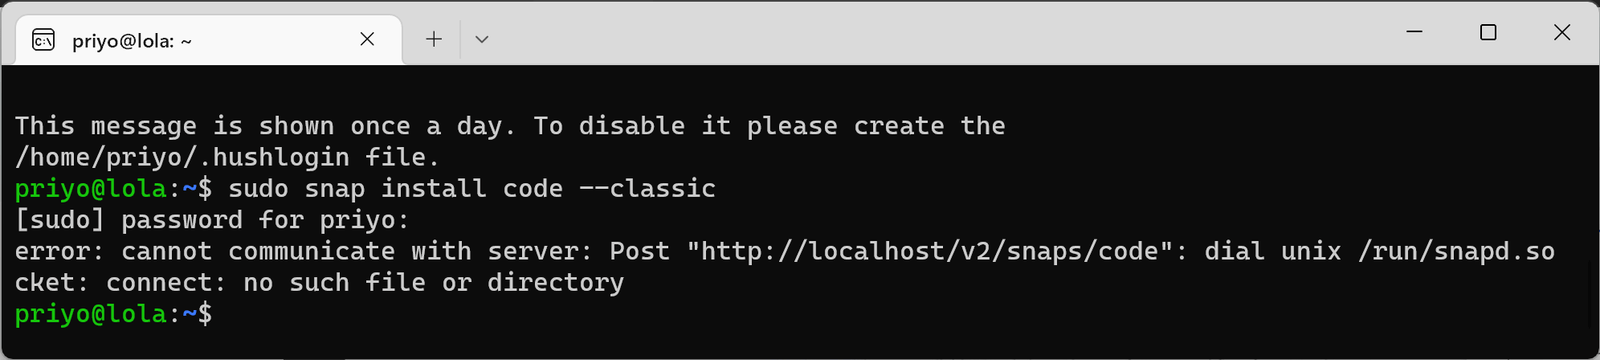
By default systemd is not enabled in wsl2, so some apps like snap or systemctl will not work on your Linux Distribution.
If you need to use systemd, do the following to enable it.
Step 1:
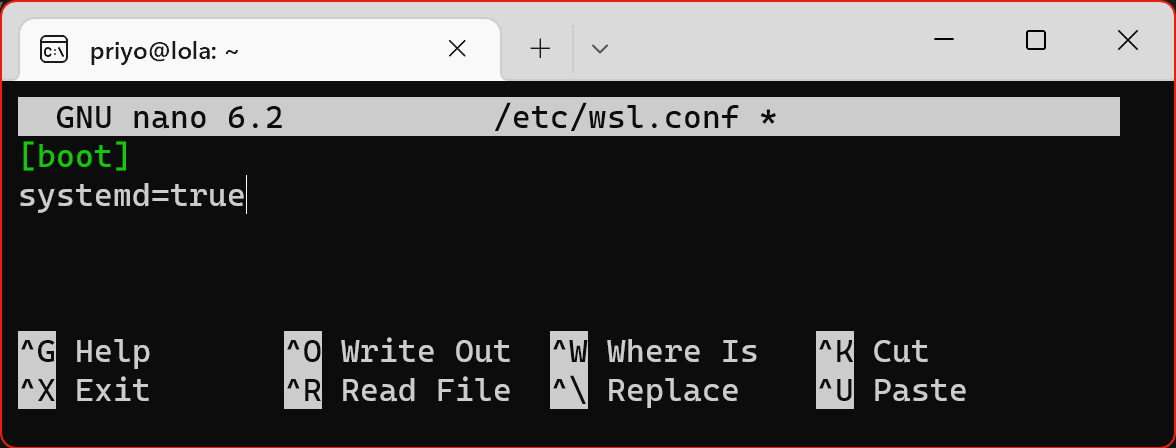
Open wsl.conf file: sudo nano /etc/wsl.conf
Step 2:
Add the following lines:
[boot]
systemd=true
Step 3:
Press CTRL+O to save and CTRL+X to exit Nano editor.
Step 4:
Close WSL distro Window and run wsl.exe –shutdown from Windows terminal to restart wsl2 instance.
Step 5:
When you run your Linux Distribution again, the systemd support will be enabled.
Let’s test our Ubuntu Running on WSL2
To test, I will try to update the Ubuntu first. Open Ubuntu App and run “sudo apt update && sudo apt upgrade -y”. Then I will install Shotwell app, a personal photo manager app for Linux. If you have already enabled the systemd support you can install app from snap store, otherwise you can use apt command. Run “sudo apt install shotwell” command to install Showell.
If Everything work properly, you should see Shotwell icon in the Start Menu.
